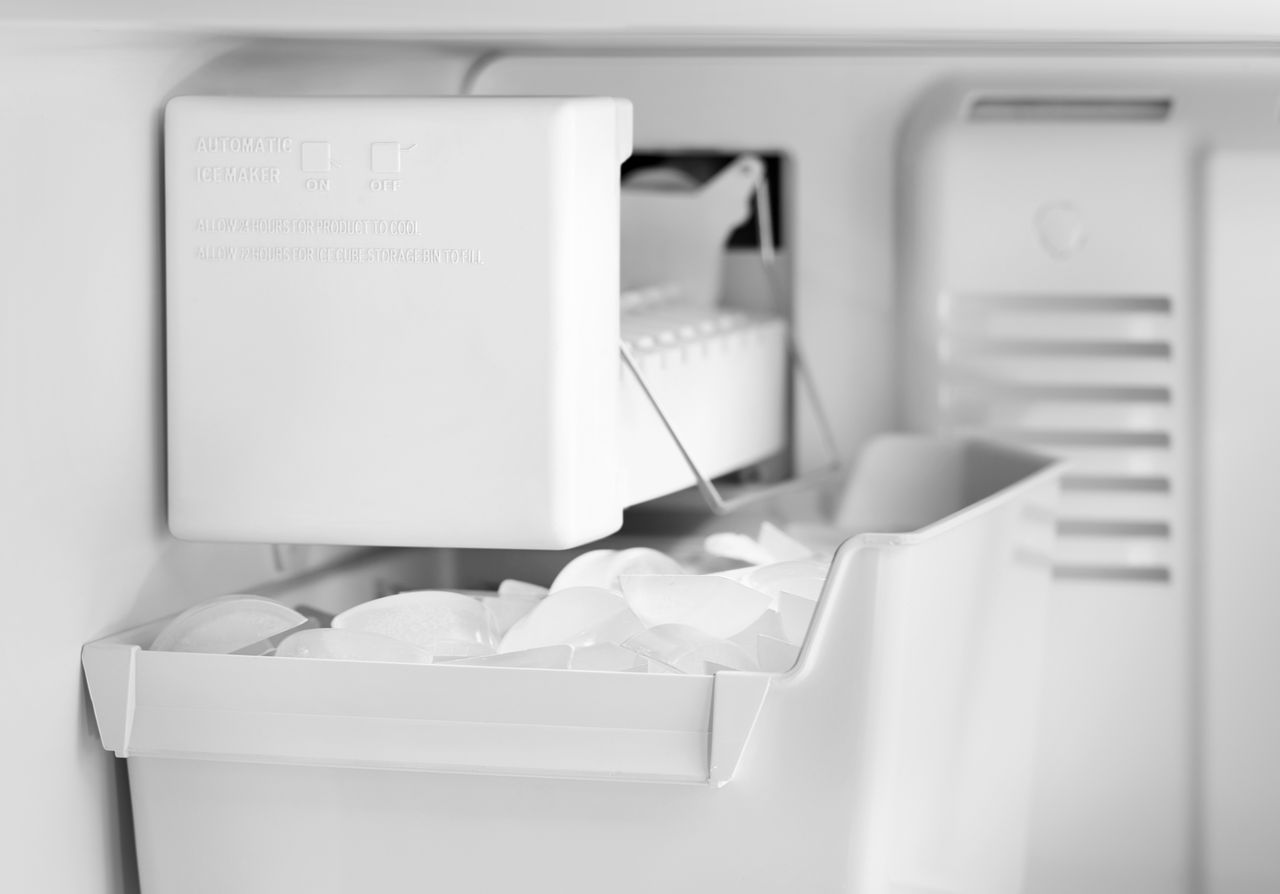
Whirlpool is one of the leading brands in home appliances. A top-freezer Whirlpool refrigerator is among the most common models found in homes across the country. This is a practical, simple model with a spacious refrigerator cabinet and the convenience of an in-freezer ice maker. The Whirlpool standard ice maker includes an ice mold assembly and an ice bin.
Whether your ice maker needs repair or needs to be replaced, we’re here to help you take care of this ask on your own. Removing an ice maker from your whirlpool fridge is a safe and very approachable repair if you take the correct steps. Let’s dive in one step at a time.
The first step is to collect your supplies. This task is very simple and only requires one hand tool just to remove and replace the ice maker. All you need is a 1/4 inch nut driver, preferably the type that ratchets. We advise wearing work gloves during any repair, especially handling cold objects.If you are replacing your ice maker, be sure to get yourself a replacement ice maker ready to install. Or, if you don’t want ice, don’t worry about reinstallation and leave the water disconnected.
Before you start the repair, take your necessary safety precautions. The ice maker is an electrical component and you will be handling wires. There is also a water line that supplies the water for ice. You will need to shut off everything.
Start by turning off your ice maker. This allows the ice maker to deal with any ice currently in the making.
Cut power to your refrigerator. Normally, the easiest way to do this is to pull the power plug. If you can’t conveniently reach the power plug, then turn off the breaker in your kitchen. Then find an alternate light source.
Your ice maker needs water, so your fridge is connected to a water line. Close the emergency valve and the refrigerator valve to stop water from flowing without an ice maker in place.
This repair won’t take long, but you will need space. Remove all the cold food in your freezer into a cooler where it will last. If you don’t have a cooler, stack it close together on the counter.
Pull out the ice bin and set it aside. This will come in handy later on but you don’t need it now.
If you have a central freezer shelf, pull it out and get it out of the way.
Look to the left, along the side where your ice maker is mounted. Above the ice maker, you will see two screws that are securing the ice maker to the wall. Take your 1/4 inch nut driver and loosen the screws. Do not fully remove them, let them hang loose. The ice maker will lean forward when you loosen these screws. That is OK and safe.
There is one screw protruding from the left freezer wall, just below the ice maker. Use your 1/4 inch nut driver to completely remove this screw. Set the lower screw aside so that you can use it again later, when you reinstall the ice maker.
Grab the ice maker which is now hanging loose from the wall. Gently lift it so that the mounting slots unhook from the two now-loosened upper screws.
Once the ice maker comes loose from the screws, you can pull it away from the connector on the back wall. However, you will feel a resistance. Stop when the ice maker pulls, that’s the wire harness.
The ice maker electrical connection is a small handful of wires flattened and connected through a white plastic wire harness. You can release the wire harness by pressing down on the central tab. When the tab releases, pull both halves of the wire connection apart.
With the wires and mounting screws loose, you can fully remove your Whirlpool ice maker from the freezer compartment.
Unhook the metal fill bar from the original ice maker. Pull the metal tip from the far end, then unhook the loop from the close end.
Reverse that process to put the fill bar onto the new ice maker. Fit on the hook, then stretch the fill bar to fit in the metal tip.
Hold your new ice maker in place so that it can be connected.
Fit the new wire harness half with the fridge’s wire harness half. Press together until they click into one piece.
Gently lift and fit the slots onto the upper screws on the freezer side. Tighten the upper screws, then return the lower screw and secure all three.
You are now safe to reopen the water lines inside and behind your refrigerator.
Plug your fridge back in or flip your breaker back on to restore the power.
Once the power and water are back, lower the fill bar so that your new ice maker can get started.
Wait a few hours for your ice maker to fill, freeze, and release a fresh batch if ice. Inspect for quality and enjoy a frosty beverage.
—Repairing your own ice maker can save you money and increase your personal handiness with future repairs. If your Whirlpool refrigerator’s ice maker needs fixing or replacing, use this process to make it happen. Contact us today for more appliance repair tips, guides, and services.